Guide List
Instructions for logging in to WordPress from the hosting management software
The WordPress software JAYbranding is using is a most user-friendly content management tool. However, for reasons of popularity, the software is also the object of many hackers. Customers who manage from 1 to many websites using WordPress with JAYbranding, please use the login method below.
Step 1: Visit the link https://hosting.jaysoft.asia:8443/
Step 2: Log in with the username/password provided – if you forget your password, you can use the link to reset Forgot your password?

Step 3: To log in to any subsite, click the Log In button as shown below to perform the desired login operation. Note, when logging in, please wait for the verification system to log in.

Instructions for granting an account in the Premium URL Shortener system
In this tutorial, JAY team will guide you how to manage accounts and grant a new user account in the Premium URL Shortener system provided by JAYbranding.
Login with the provided Admin account
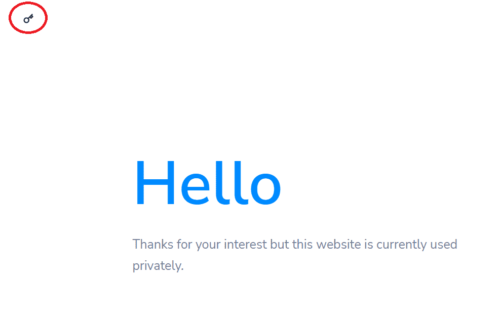
Step 1: After accessing the URL provided by JAYbranding (eg 1050.jaysoft.dev), you will see a greeting interface appear similar to the image below. Click on the key icon to go to the page Log in.

Step 2: Import Email or username & Password Admin account has been provided and click Login to login.

After successful login, you will see the member interface as shown below.

Instructions for managing member accounts & granting new accounts
Step 1: The interface after logging into the account (whether it is an account with Admin or normal User rights) is the interface of a normal User. To use the account management feature, you need to switch to the Admin interface.
In the upper right corner of the screen, tap Admin Panel (next to the avatar frame) to enter the Admin interface.

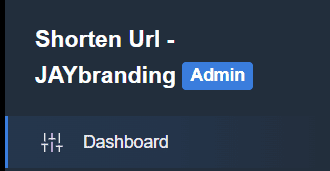
After entering the Admin interface, you will see a tagline Admin blue next to the website name.

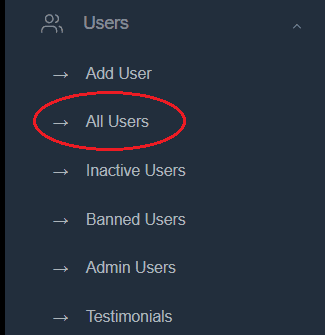
Step 2: From the left menu, select Users.

A drop-down list will contain all the features related to account management such as Add User (add new account), All Users (all accounts), Inactive Users (account is no longer active), Banned Users (account has been banned), Admin Users (Admin account), Testimonials (testimonials, reviews).
Step 3: Because here, most of us use the Premium URL Shortener toolkit in the form of internal (private) rather than creating a public service that anyone can use so you just need to care Add User and All Users. Feature Add User also accessible from All Users. So we will choose All Users.
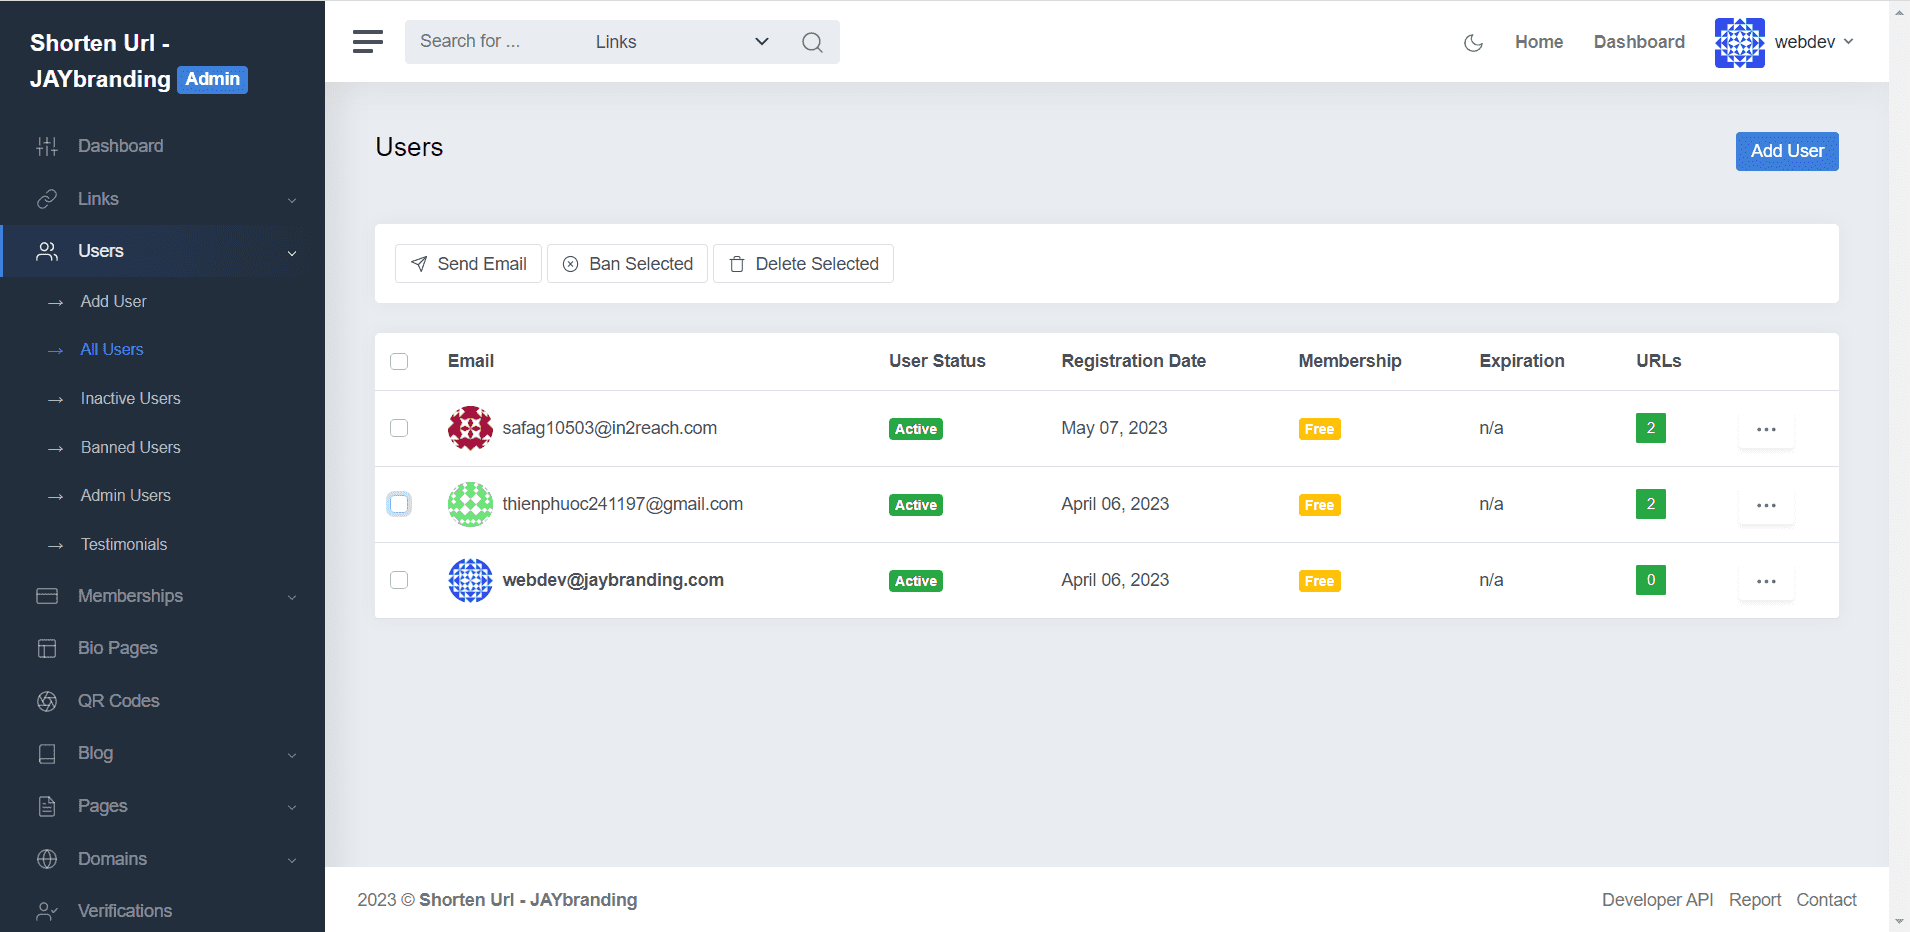
Step 4: At interface All Users, you will see a list of existing accounts in the website. Here, you can check the checkbox next to Email and perform functions like Send Email (send mail), Board Selected (ban account) & Delete Selected (Delete the account).
Step 5: To grant a new member account, press the . button Add User right side of the screen.

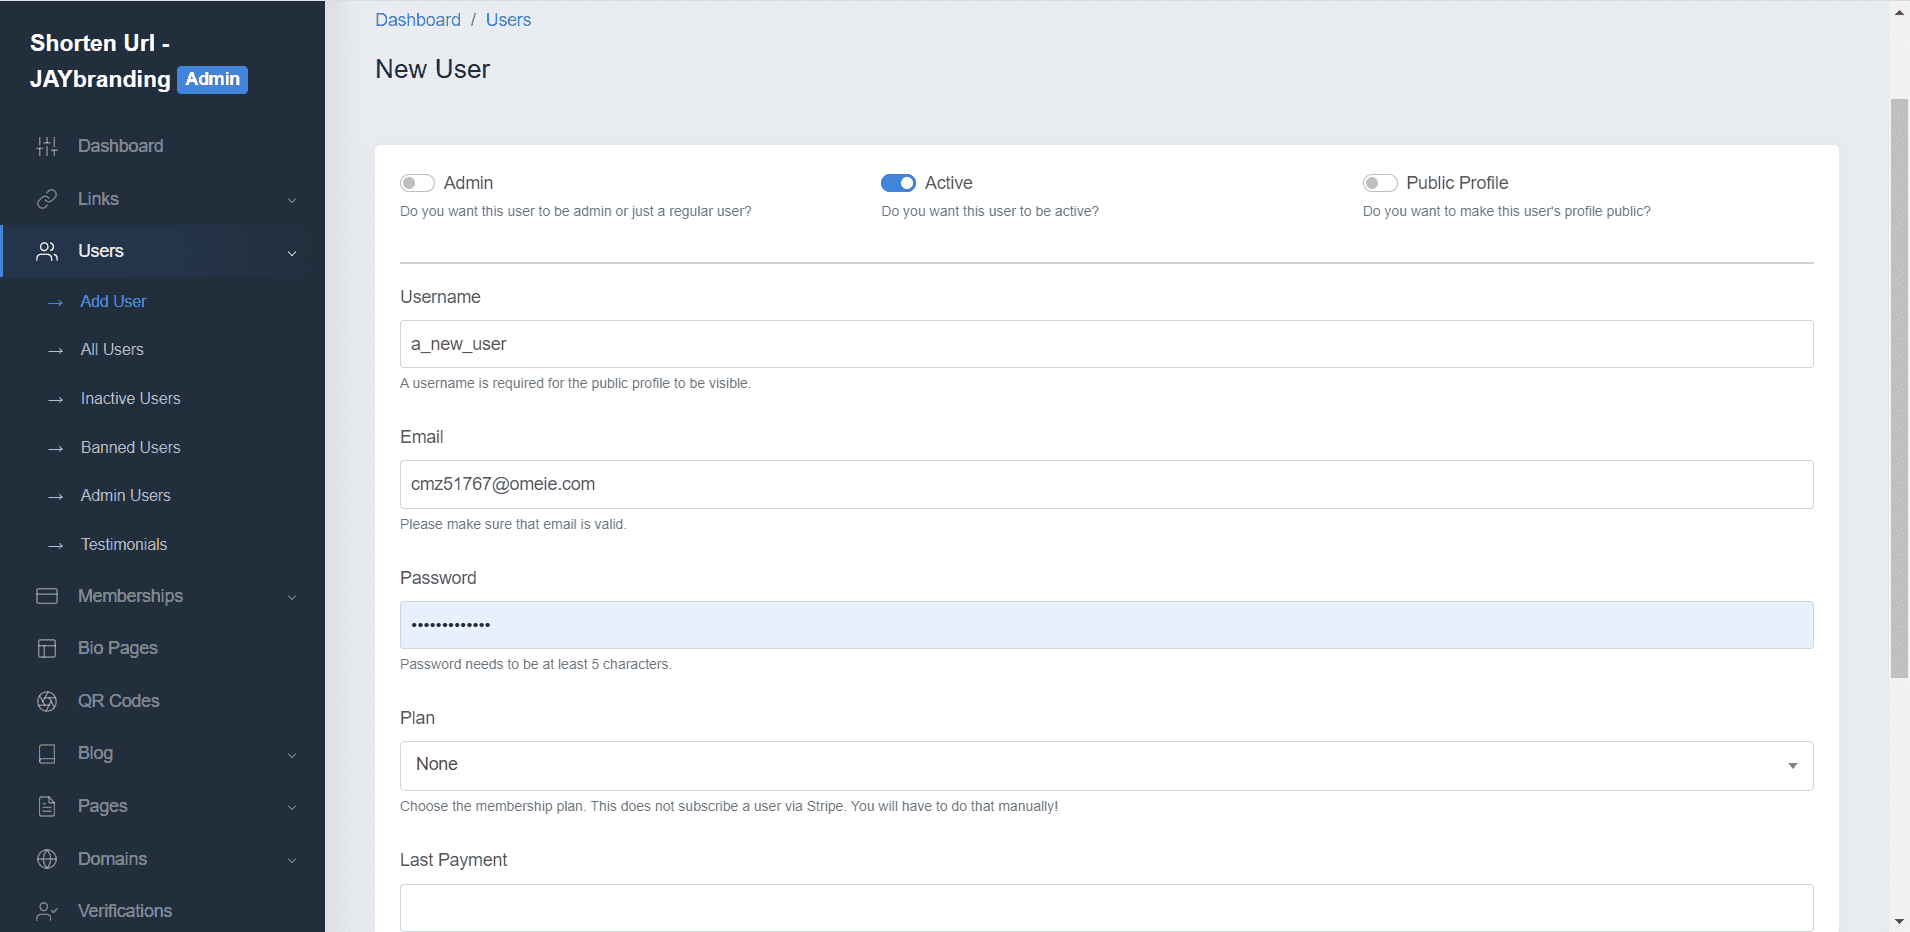
Step 6: At the interface New User, you enter all the information like Username (account name), Email, Password (password).
Since we are using the internal system here, the three fields Plan, Last Payment and Expiration we leave it blank.
With three switches above:
– Admin (grant a new account with Admin rights): You should only grant an Admin account to someone with sufficient authority to avoid unnecessary system troubles (Recommended). turn off, use only a single Admin account granted).– Active (Activation): Turn on if you want the grant account to take effect immediately, off if you want to pre-create an account but don't want it to be usable right now (Recommended) turn on).
– Public Profile (Public Information): Turn on if you want to make information about this account public (Recommended) turn off since we are using internal system)
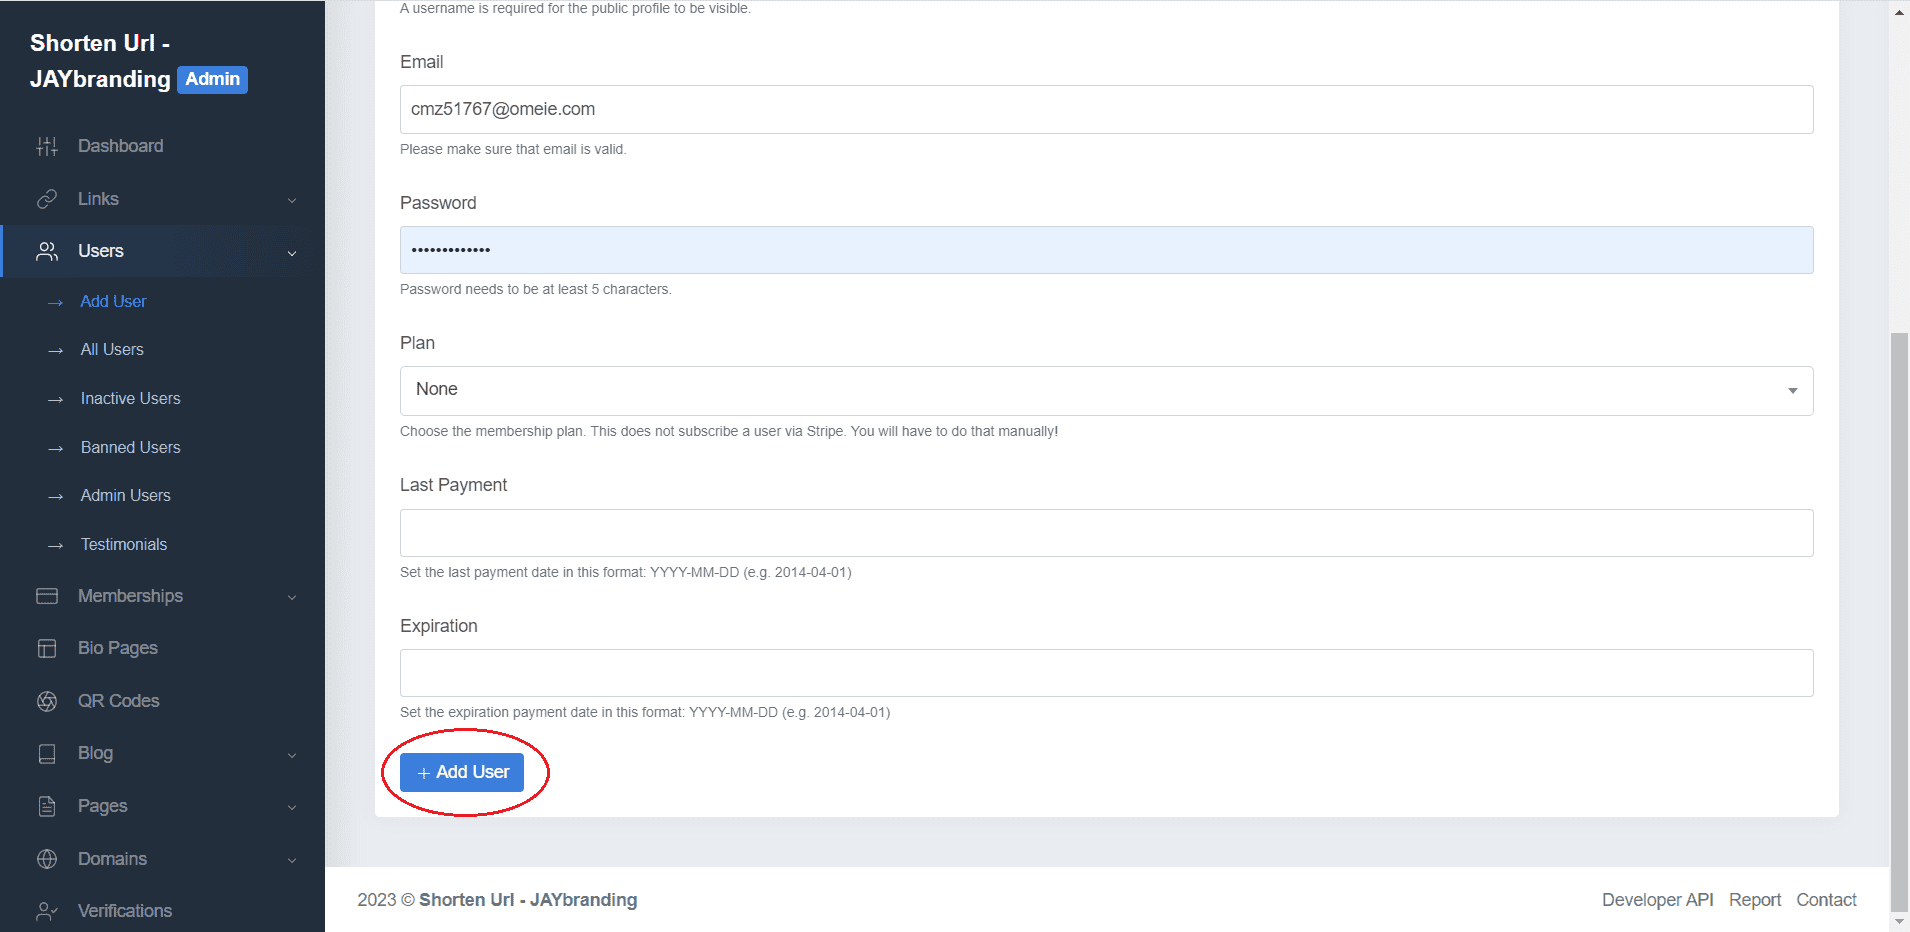
Step 7: After you have entered all the information and carefully checked, select Add User.
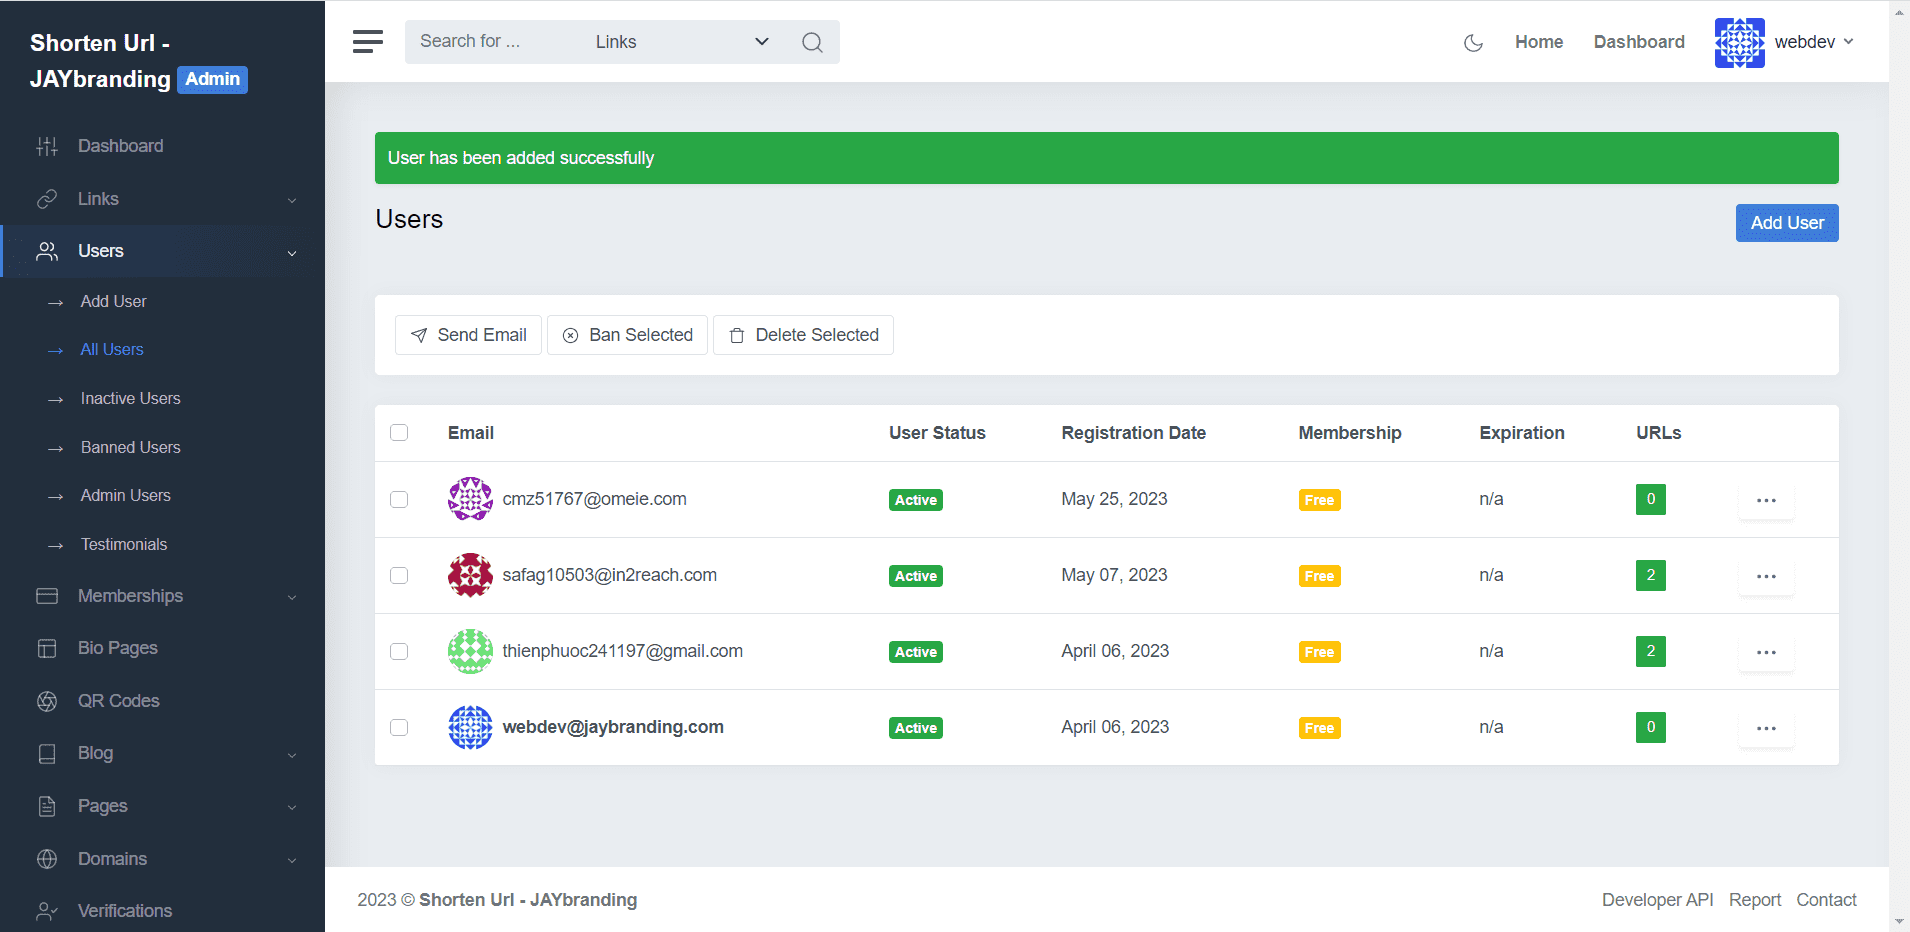
You will be redirected back to the page All Users initially, with the success message line User has been added successfully blue above.
At this point, you can already log in and use features like shorten link and QR Code as a tutorial INSTRUCTIONS TO CREATE QRCODE WITH SHORT LINK AND VIEW VISIT REPORT IN ONLY 4 STEPS.
Good luck!
Instructions to create QRCode with shortened link and view visit report in just 4 steps
With the Premium URL Shortener toolkit provided by JAYbranding, it's easier than ever to create QRCode with shortened link and view statistics of visits!
Service account login
Step 1: After accessing the URL provided by JAYbranding (eg 1050.jaysoft.dev), you will see a greeting interface appear similar to the image below. Click on the key icon to go to the page Log in.
Step 2: Import Email or username & Password provided and click on Login to login.

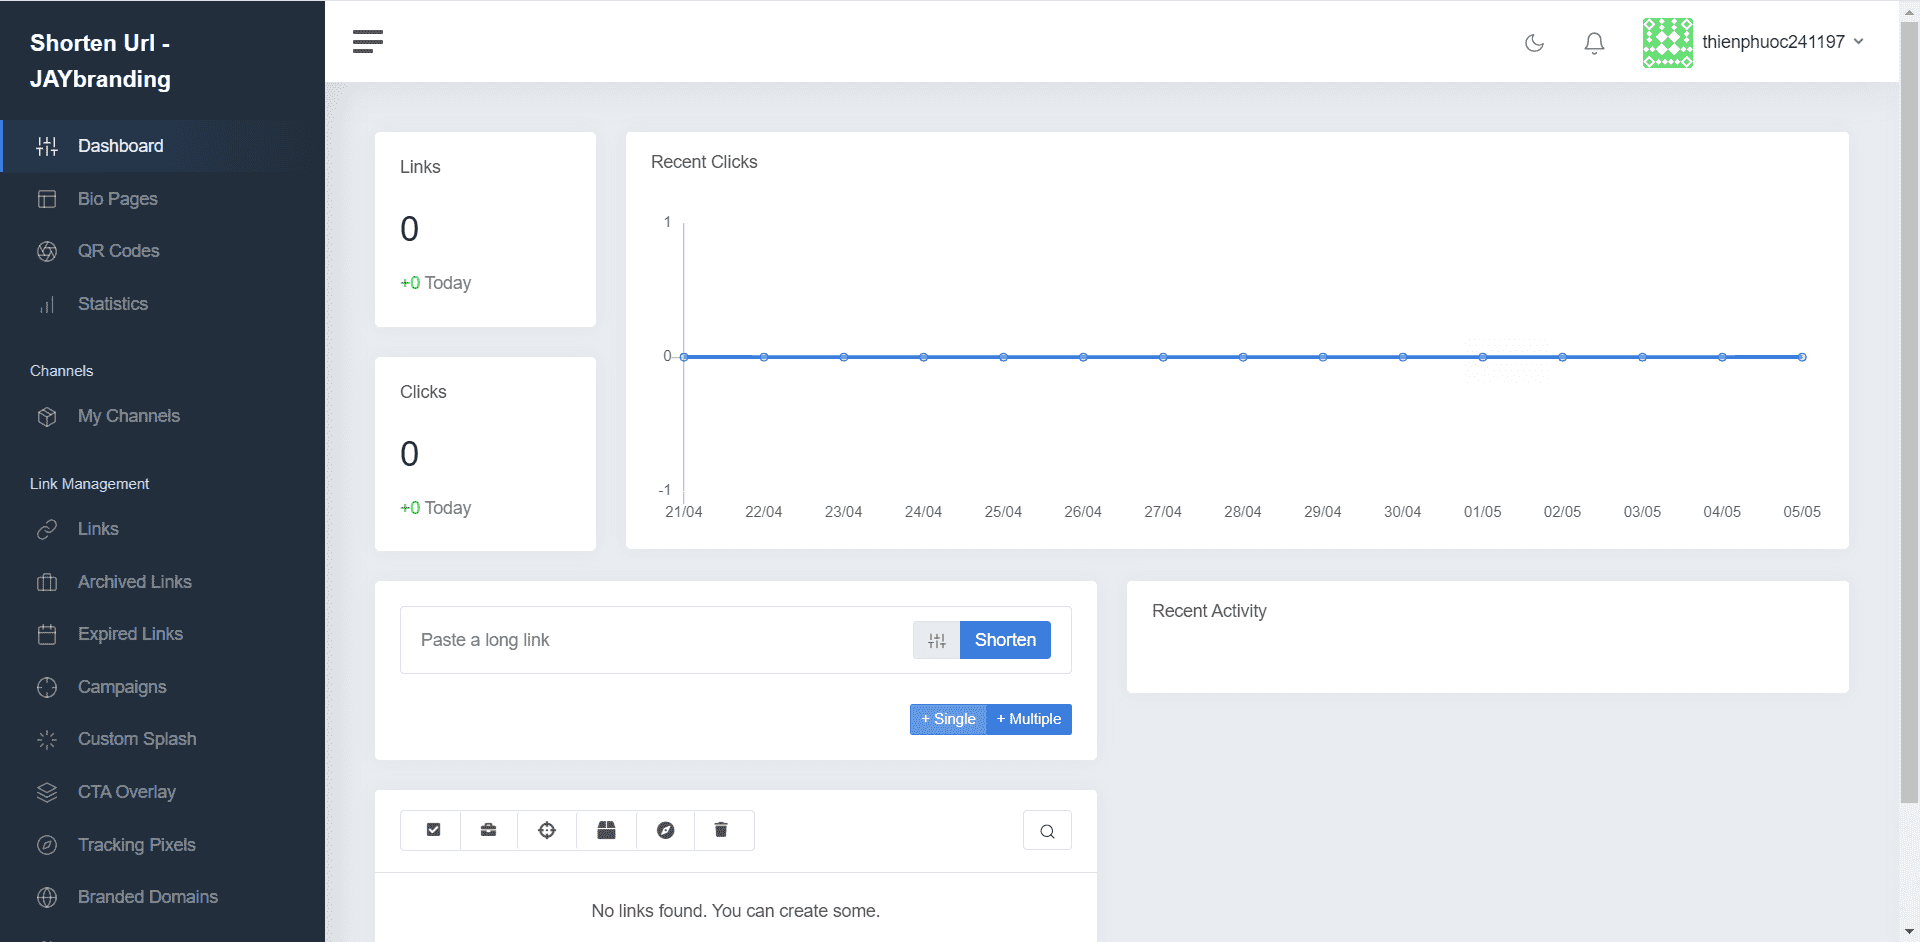
After successful login, you will see the member interface as shown below.

Instructions for creating shortened links
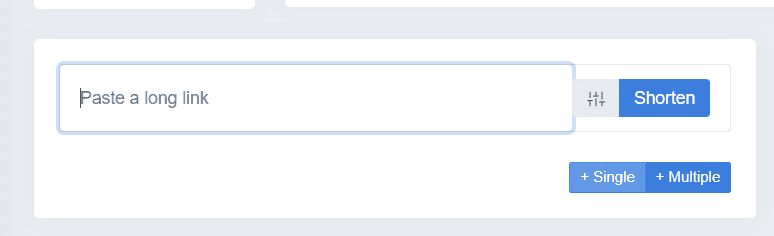
Step 1: Right at the page Dashboard of the user interface, you will see an area that allows shortening the link as shown in the image.

Here, there are three buttons we need to care about: Settings (gray button), Single and Multiple.
Because Settings are technical options that will not be covered in this tutorial.
Function Single Used to shorten a link.
Function Multiple Used to shorten multiple links, allowing up to 10 links to be performed at the same time (enter one link per line).
Step 2: Copy the link you want to shorten and paste it in the box Past a long link. Then press Shorten.

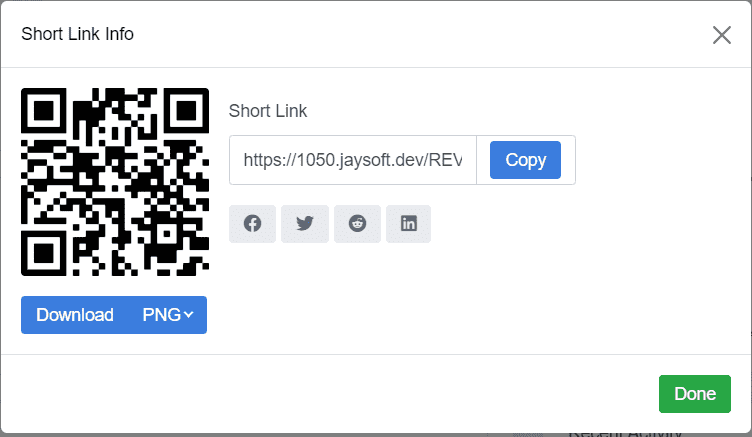
Step 3: A new dialog box will appear. Here you can Copy link shortened, share shortened links on social networking platforms or Download code QRCode leads to shortened link (there are two formats: PNG and SVG).

Instructions to create QRCode with shortened link
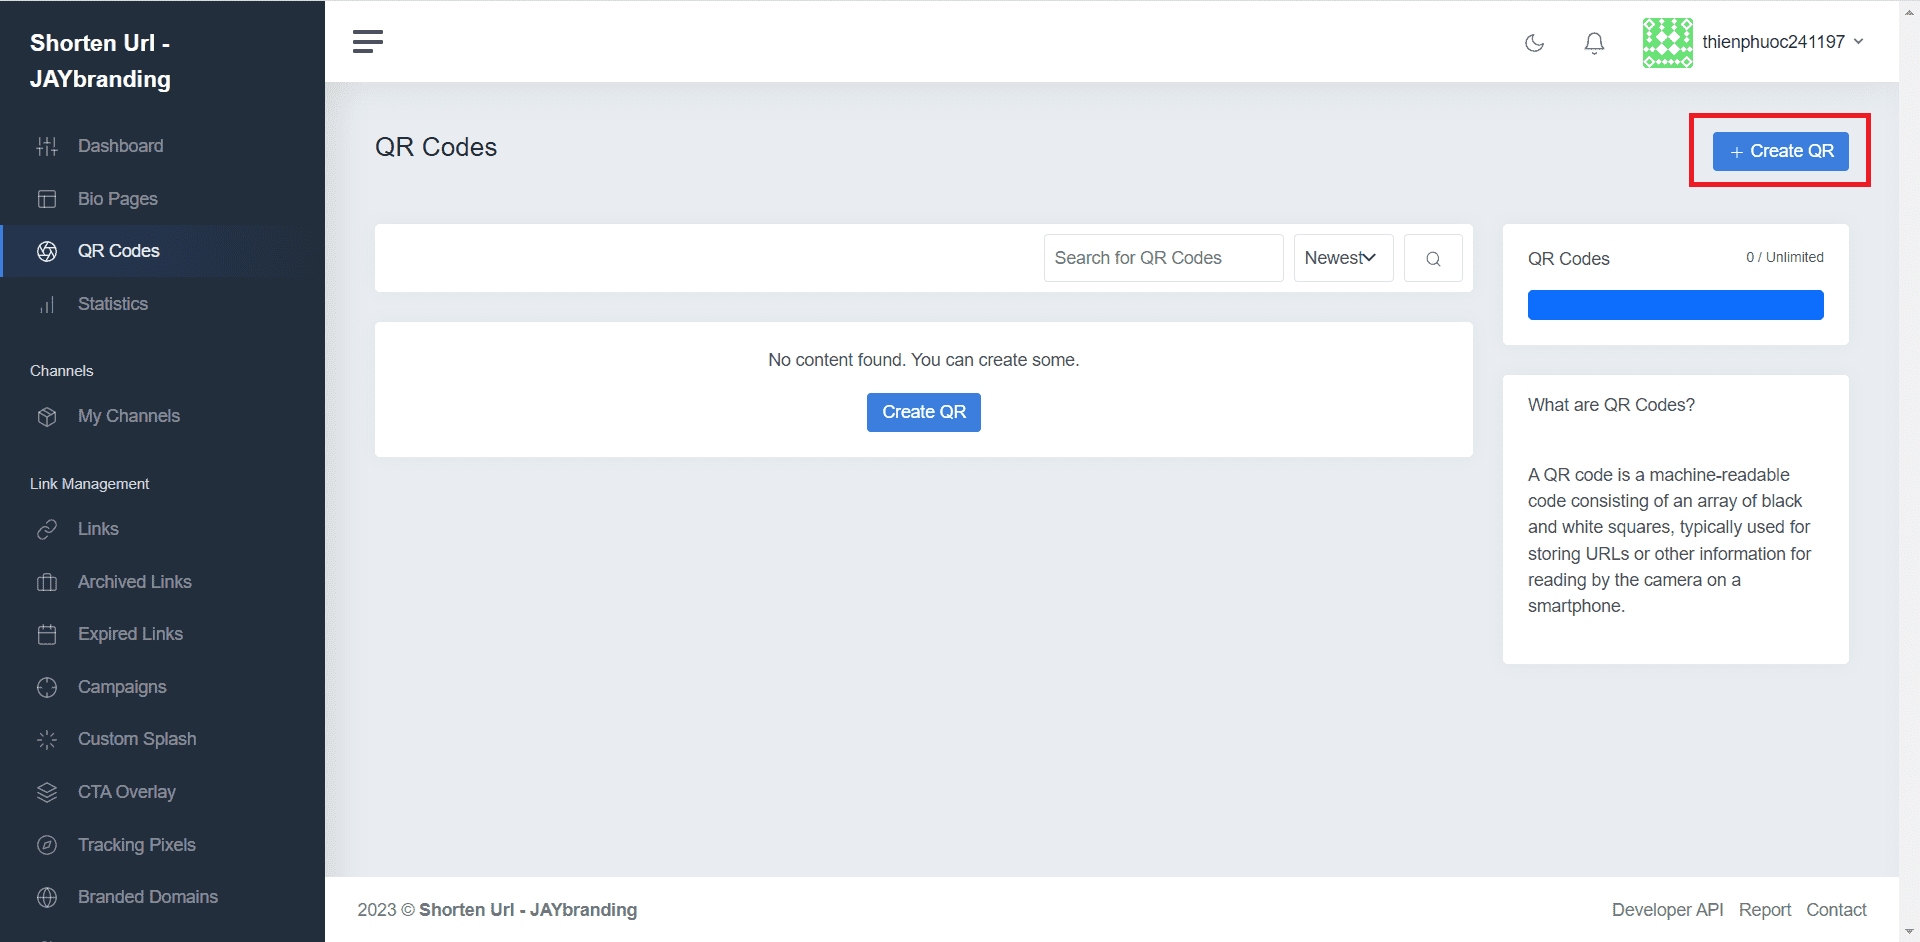
Step 1: From the left menu, select QR Codes.

Step 2: At interface QR Codes, press Create QR.
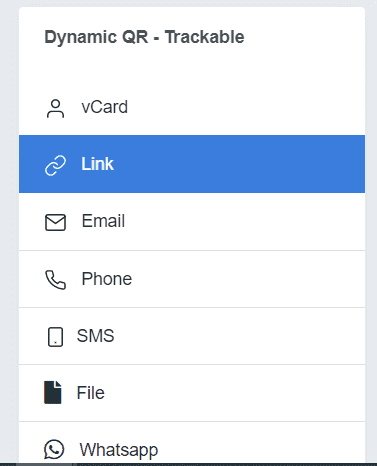
Step 3: Section Dynamic QR – Trackable, select Link.

Step 4: Enter a name in the field QR Code Name (important for you to proceed to view statistics and manage later), paste the link in the section Your Link.
For example, create a shortened link for your Portfolio page JAYbranding. (https://www.jaybranding.com/portfolio)
At this point, you can already press Generate QR create a QRCode or so, but if you want to own more unique and fancy QRCodes, see more step 5.

Step 5: Decoration for QRCode.
There are two features that allow you to decorate your QRCode Colors and Thiết kế.
- Colors:
Select Single Color to generate a monochrome QRCode or Gradient Color to generate a gradient QRCode, with fields:
– Background: QRCode background color
– Foreground: Color of QRCode.
– Eye Frame Color: Border color of three eyes around QRCode.
– Eye Color: The color of the three eyes around the QRCode.
– Gradient Start – Gradient Stops: Two colors of QRCode if select feature Gradient Color.
– Gradient Direction: Color gradient direction if feature is selected Gradient Color (Vertical – vertical, Horizontal – horizontal, radial – center, diagonal – diagonal).

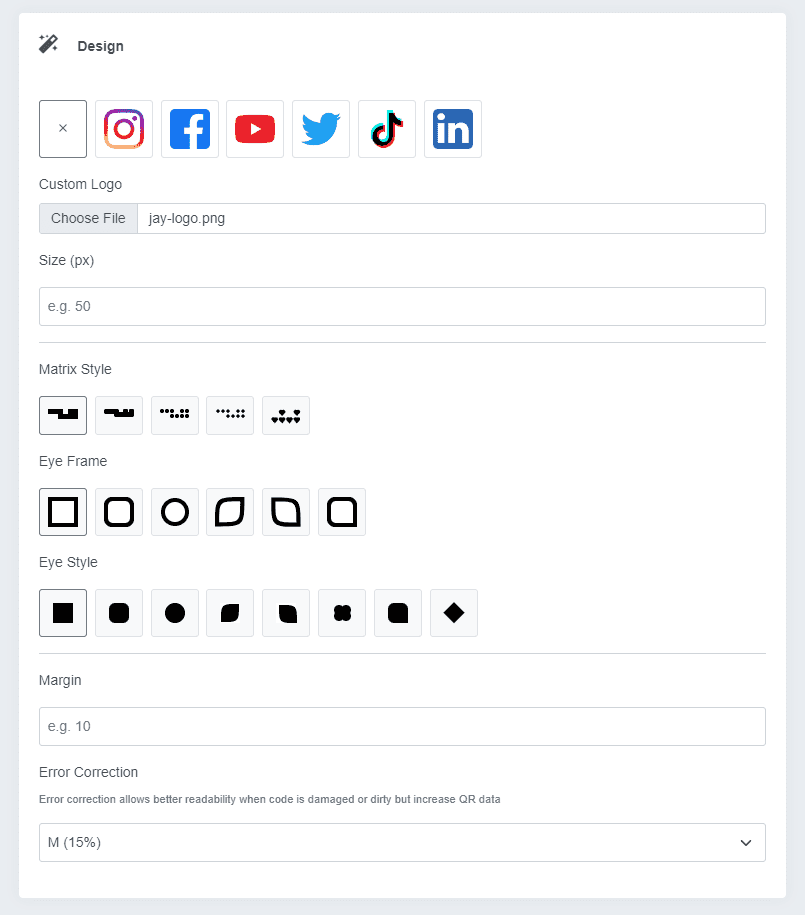
- Thiết kế:
– Choose the logo that appears between the QRCode, or upload your own logo at Custom Logo.
– Size (px): Choose the logo size.
- Matrix Styles: Select QRCode shape.
– Eye Frame: Select the border shape of the QRCode three eyes.
- Eye Style: Select the shape of the QRCode three eyes.
– Margin: Select margin spacing.
– Error Correction: Permissible error rate. The higher the ratio will help when the QRCode is blurred or damaged (for example when printing on paper).

Once selected, click Preview to preview the shape QRCode, or Generate QR to officially generate QRCode.
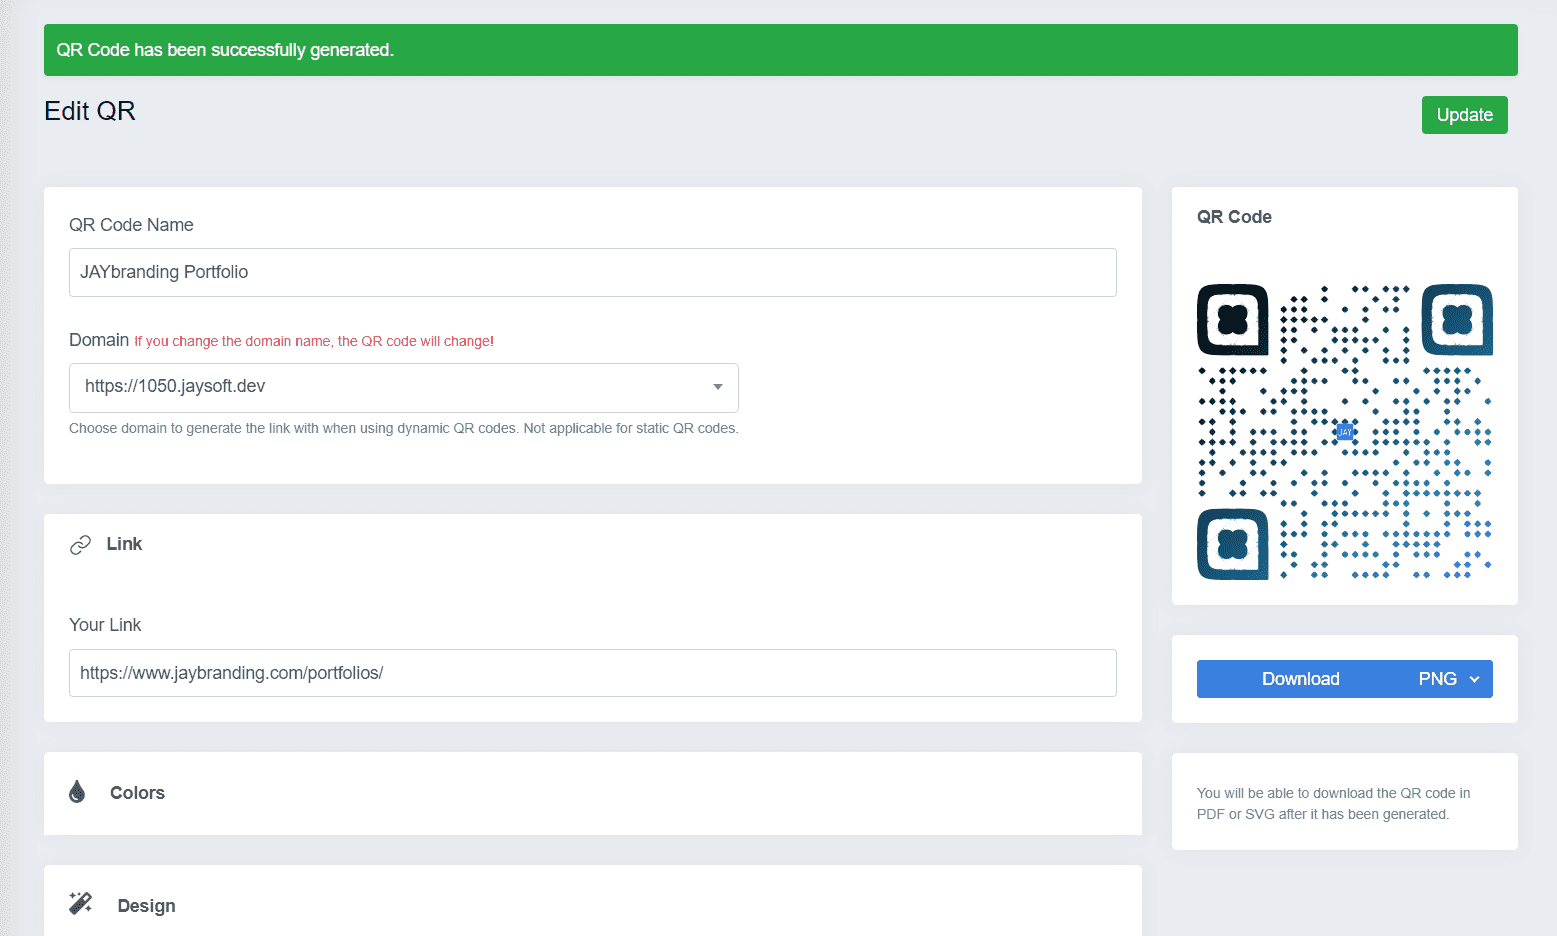
Step 6: Display Edit QR will appear with the message QRCode has been created successfully.
Here you can Download QRCode with PNG, SVG or PDF format to your computer or edit the data and click Update.

View visit statistics
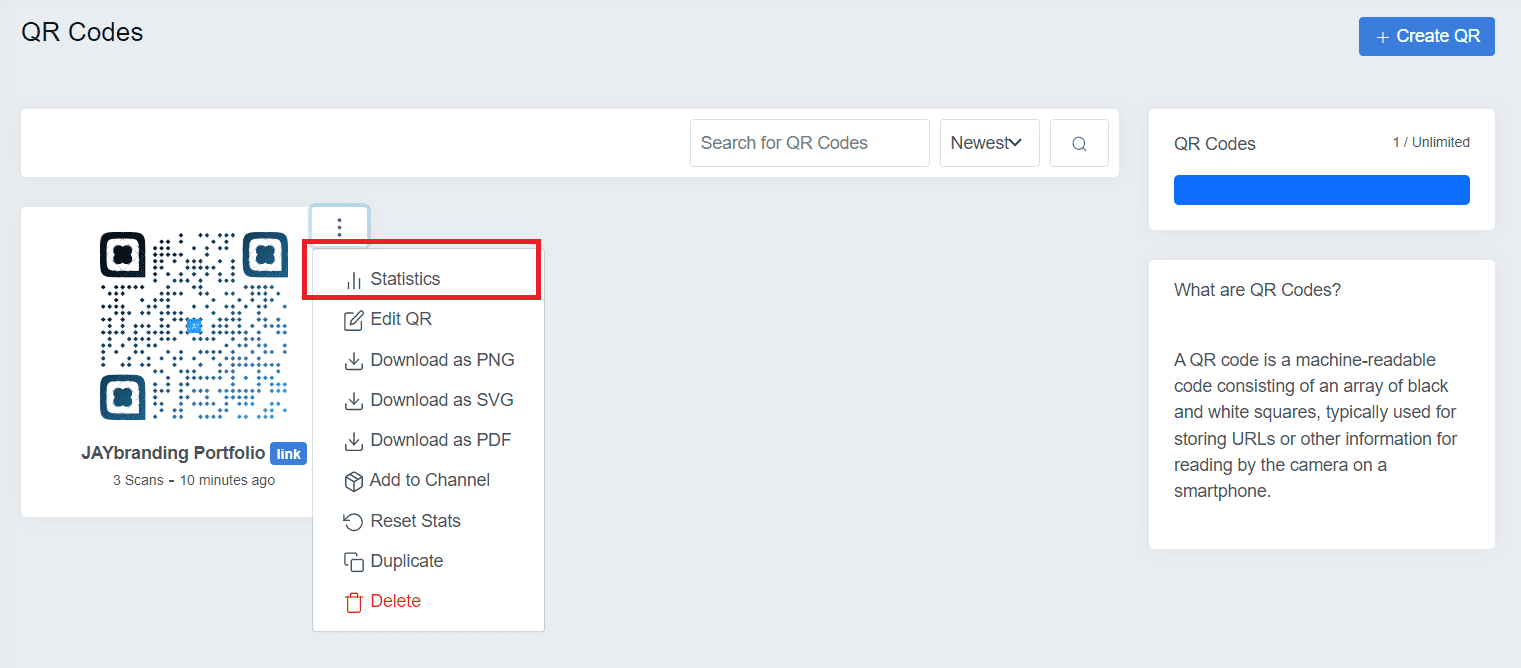
Step 1: Revisit the interface QR Codes. You will now see the QRCode you just created appear.
Click on the three-dot icon in the right corner of QRCode and choose Statistics.

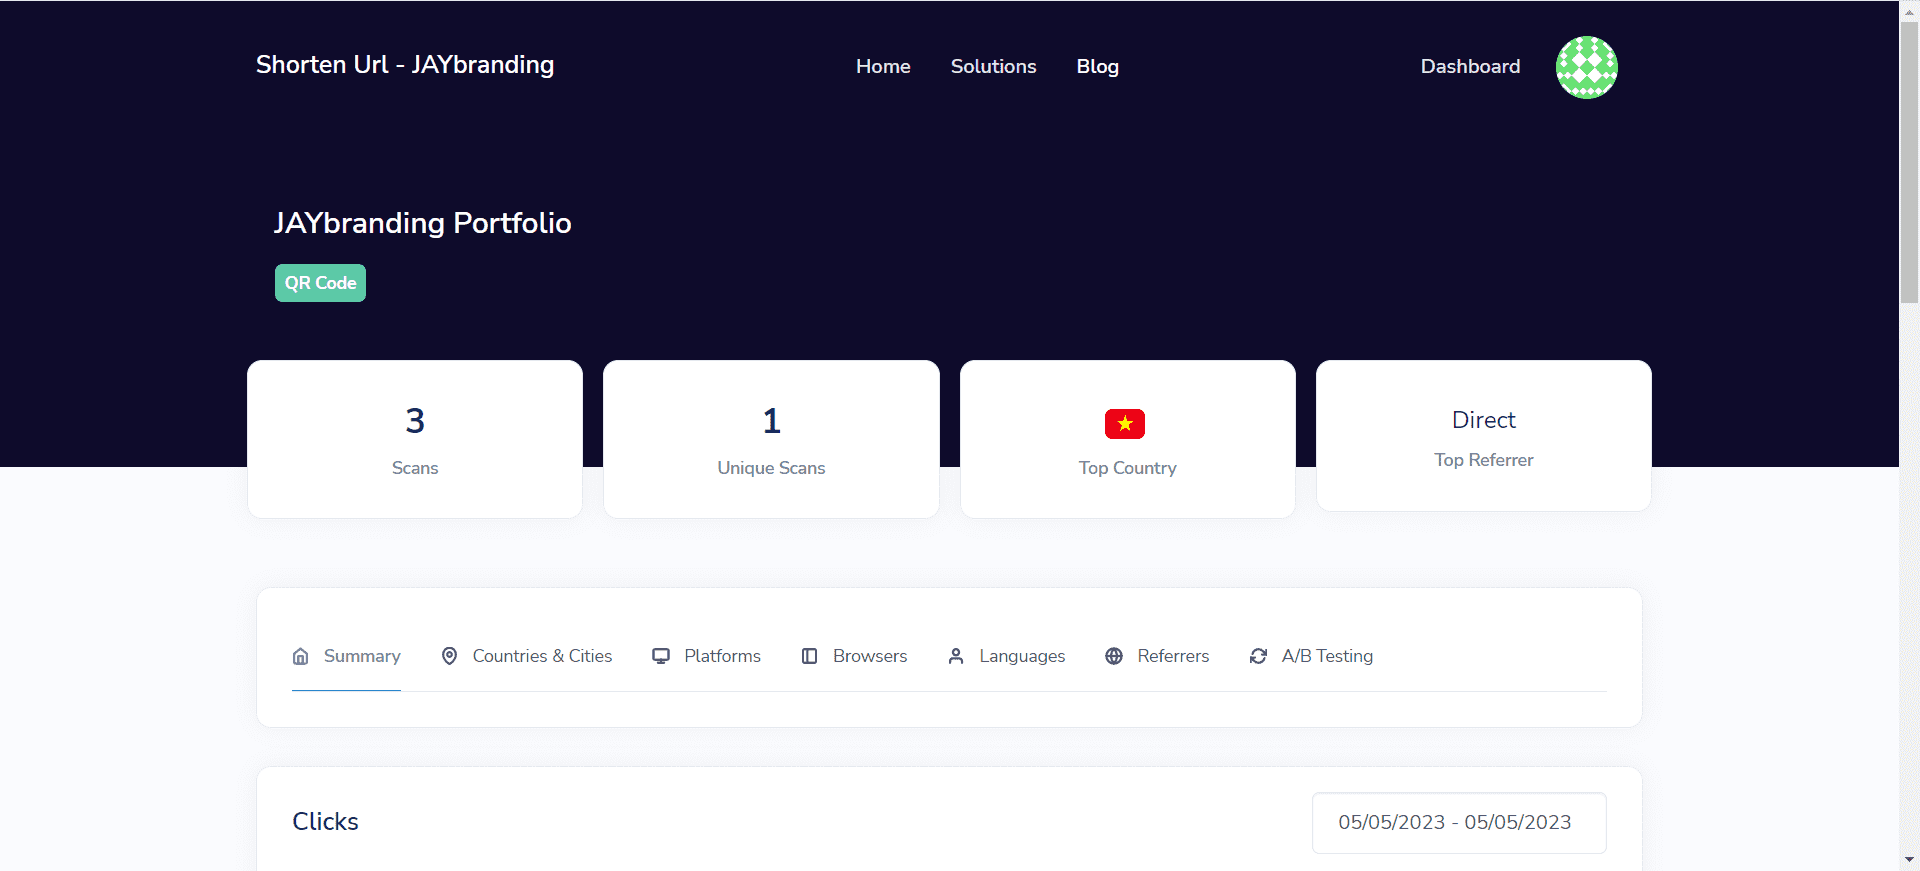
Step 2: A new interface will appear. Here you can see all the statistical information such as:
- Scans: Number of scans.
- Unique Scans: The number of scans is counted as unique (determined by network IP).
- Top Country: Country scanned the most
- Summary: Overview diagram.
- Countries & Cities: Country and city.
- Platforms: Platform (eg Android – iPhone).
- Browsers: The browser accesses the link.
- Languages: Language of the scanning device.
- Referrers: Intermediate access (eg access from Facebook, Twitter, Instagram)

Manual translation guide for TranslatePress
Translate content on the Website
To translate your web page, simply click on the ' tabTranslate Site' on plugin settings page or above button WordPress admin bar.
In this editor, you can click on any text on the web page in the right pane and TranslatePress will translate it in the left column.
Whenever you make changes, the results appear on the page in real time.
In this live editor, you can click on any text on the website in the right pane. Then TranslatePress will load it in the left column for translation.

Instructions for translating website content
Next, click on the language you want to translate into, then provide your translation.
After entering the translation, click the “Save Translation" at the top and then select the button "next“. TranslatePress will automatically load the next string on the page for translation.
Alternatively, you can also click the drop-down menu below the default language. It will display a list of translatable text strings on the page. You can select any string, and then provide a translation.

List of translatable text strings on the page
Any content on the site can be translated. This includes navigation menus, buttons, sidebar widgets, meta text, etc.
You can go to any page by clicking on the links on the screen, and then start translating that page.
TranslatePress allows to start translating any page or post on the website right after logging in. Just click the “Translate Page” at the top to enter the live editor.

Multi-language translation with plugin TranslatePress
After translating a string, the plugin will automatically translate it in other locations. For example, after translating the title of a post, the title in the sidebar widget will also be automatically translated.
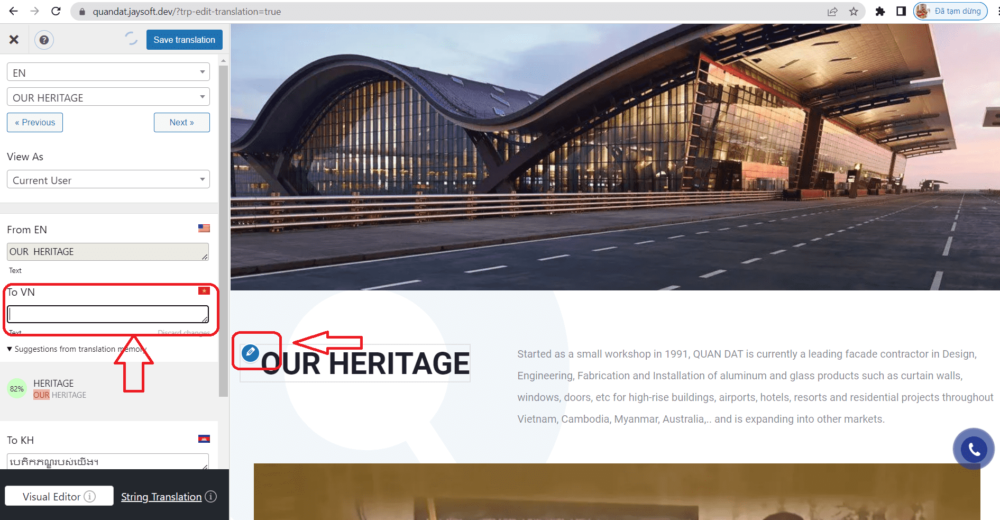
 Select button Translate Page to manually translate the content to be translated
Select the content to be translated into another language, click on the "Pen" icon to fill in the content to be translated in the box on the left.

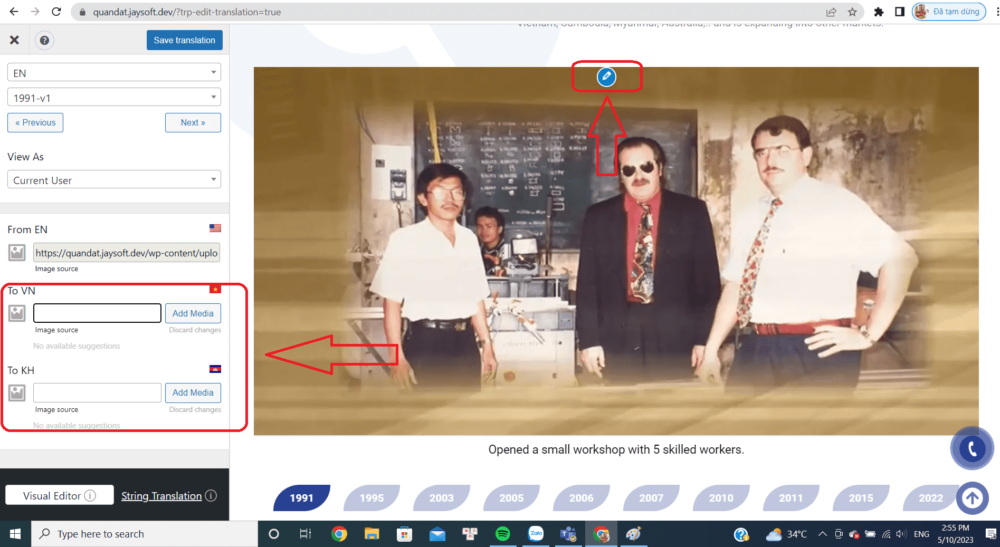
Hover over the image, click on the "pen" icon to adjust the image to suit the selected language

Hover over the image, click the "pen" icon to adjust the caption in the left box to match the selected language.
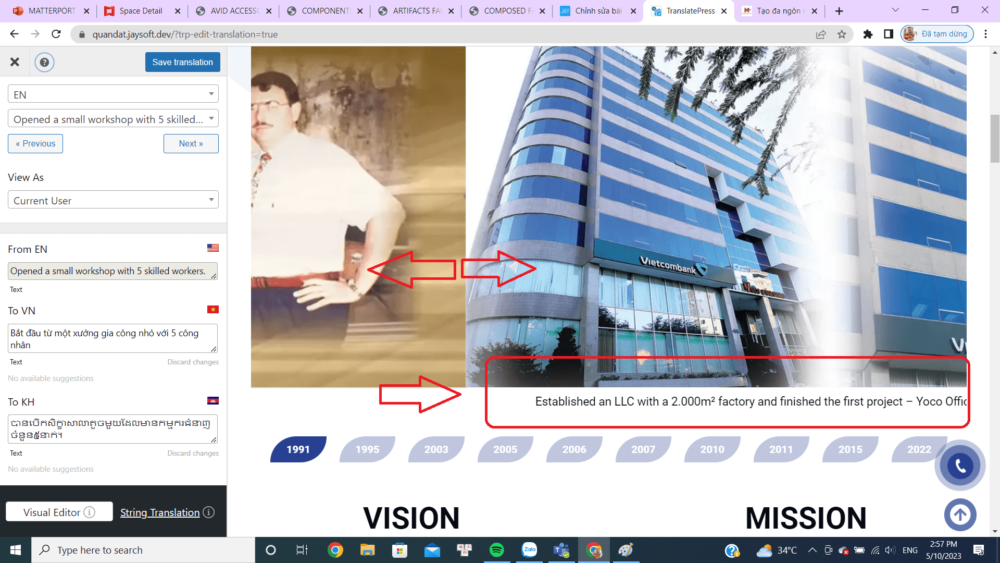
Drag the photo to the side to be able to edit the caption content on each photo

Press the button " Save Translation” to save changes
Now you can go to your website to see the results. If you liked this article, please support us by sharing this knowledge with your friends.
How to Use Elementor in WordPress
Instructions on how to use Elementor
Elementor brings an intuitive design to the user. So you can learn the following basics. Use editing right on your website
- Step 1: First, at the homepage of the website, select "Edit with Elementor“

- Step 2: Now, you just need to click on the item you need to edit, the left hand side will show the information you need to edit.
Change the content
Change image
- Step 1: Select the image to change
- Step 2; Select "Content" >> "Section add photos“
- Step 3: Select 1 or more photos to change
- Step 4: After finishing select the image >> "Update” >> Reload the page to display updated information
- Step 3: You can search for specific widgets to customize your page. Choose basic elements like heading, image gallery or more advanced elements like animated headlines and testimonial carousels.

- Step 4: Click 3 tiles in the left corner >> Site settings. In this menu, you can customize and reset the default colors and fonts for your pages. You can also configure general settings for your entire website on Elementor

- Step 5: You can click the . icon History at the bottom of the table to access the section Edited version Elementor's built-in

In the tab Act, you can track your changes, moving back and forth. In the tab Edited version, you can switch between your revisions and undo any previous version.
Instructions to change Favicon
- Step 1: Click 3 tiles in the left corner >> Site Settings >> Site Identity

- Step 2: Click "Trang's favicon“

- Step 3: Select the appropriate image >> "Update” >> Reload the page to display updated information

Instructions to change Banner
To change the banner in many different styles, do the following:
Banner showing 1 image
- Step 1: Select the first item in "Navigator“, since the banner is first on the site, select “Type“
- Step 2: Because an image is displayed, you should choose the "Classic“, after selecting the right image.
- Step 3: You choose "Update" and "Reload"Return to the website to display the latest images at the banner
Banner display in video format

- Step 1: Select the item with the camera icon
- Step 2: Prioritize video links from youtube to achieve the best quality
- Step 3: You can choose how many seconds to start and end time to display on the banner
- Step 4: "Play once“will not show repeat banner
- Step 5: After “Update", you "Reload“return to web page to display changed information

For "Backup background” allows you to choose the image to display on the banner, in case video is not showing because the network is "Backup background" will appear.
Banner displayed as a slideshow

- Step 1: Select the item with the image icon
- Step 2: Select the plus sign below and select the image. Here, you can choose from a variety of images to display
- Step 3: After "Update", you "Reload“return to web page to display changed information
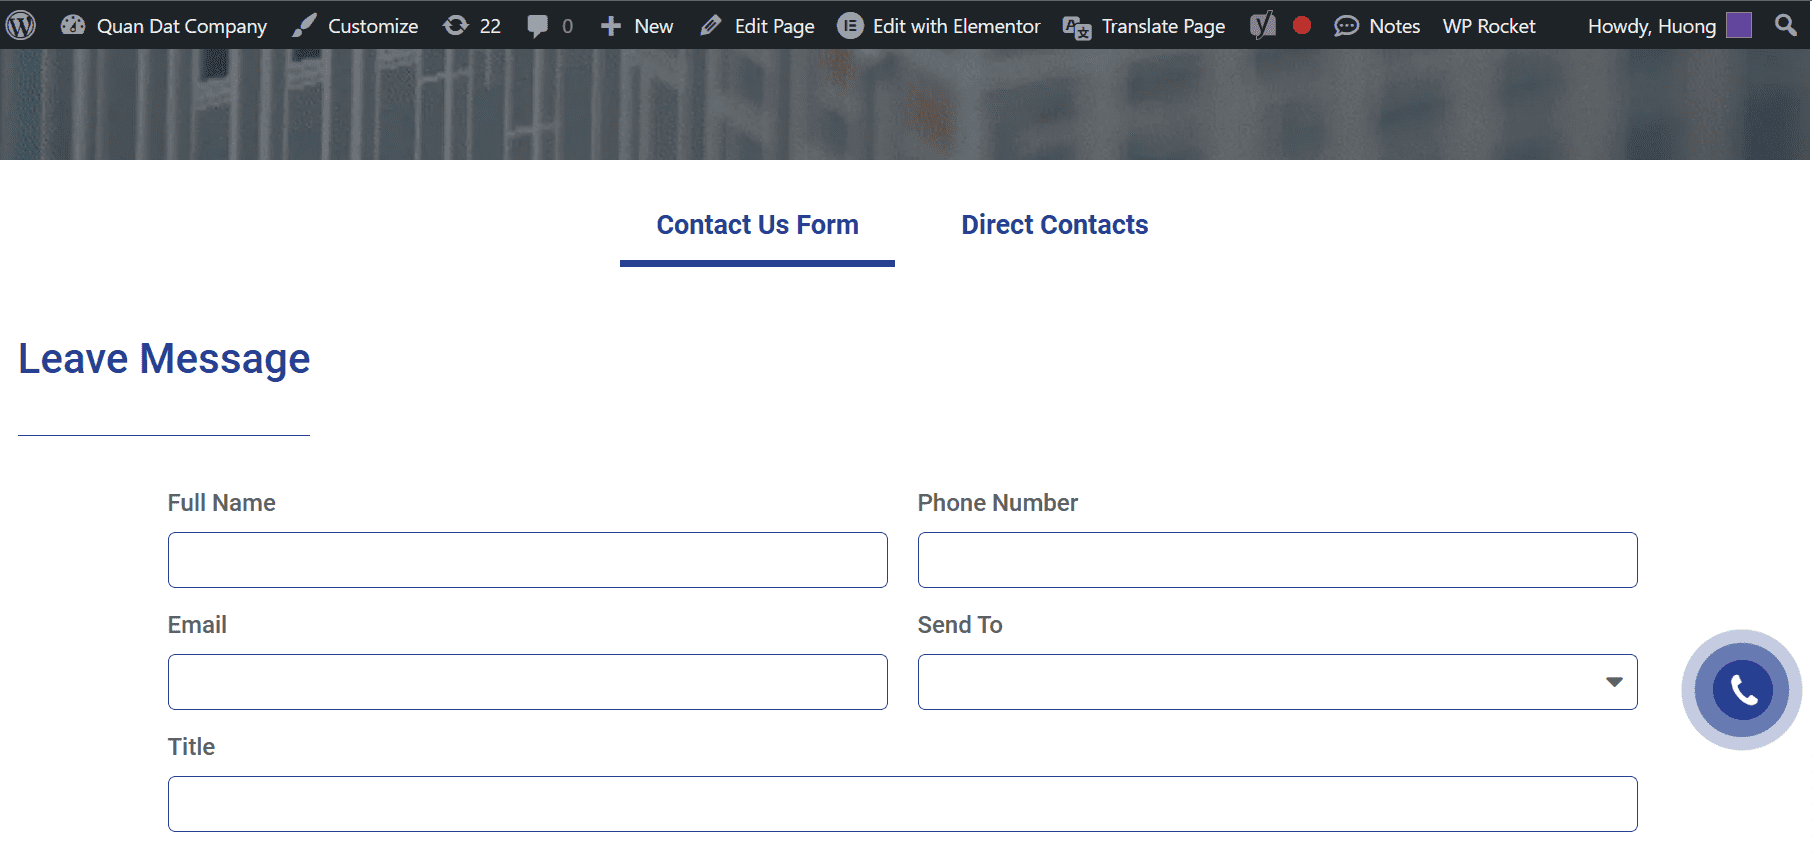
Instructions for editing Form
Edit form convenient for you to track and record customer information
- Step 1: You select the part containing the form in the website >> "Edit with Elementor“

- Step 2: Click on the “Form” to make corrections to the information

- Step 3: At the editing section select "Email“
- Step 4: Note the following information:
To: will be the email to receive the form's information
From email: email sent from the website
Detailed instructions for submission
You can monitor and manage the forms submitted by accessing the “Submissions” tab in the “Elementor” section of the WordPress admin page.

Instructions to view details of submit information
- Step 1: Select the email you need

- Step 2: Once selected, the website displays detailed information you can view and edit

Instruct export all, export by ds option
Here, you can view detailed information about the forms that have been submitted and perform other actions such as deleting or exporting to an Excel file for further manipulation. Select "Export All to CSV” to go to excel file

If you want to export the information forms file, do the following:
- Step 1: In the box "All Forms" >> "Contact Us Form“
- Step 2: When you have displayed the correct information you need >> "Export Filtered to CVS“

Instructions for filtering Form
Section "All Form” allows you to choose the form from the website, the form that the customer has entered information on

Guide to Publishing and Managing WordPress Posts
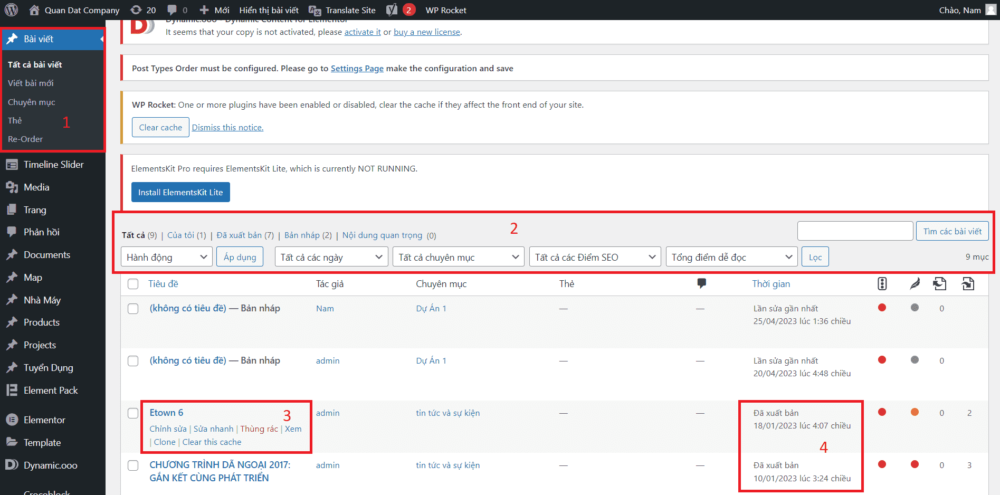
1/ The page displays all posts:

1/
- Click “All Posts” to view all posts.
- Click “Write a new post” to create a new blog.
- Click on “Category” to view all created categories and posts in that category.
- Click on “Tags” to view the created tags and the posts in the tag.
2/
- Fill in the box and click “Search Posts” to find the article you want
- “All Days” to filter posts by day, month, year
- "All categories" to filter posts by category
- “All SEO scores” to filter articles by SEO score
- Check the boxes below item 2 and click "Action" to delete or edit multiple posts at once
- Drag and drop articles to adjust the display position of articles on the website.
- ,…
3/
- Click "Edit" to edit the article in depth
- Click "Quick Edit" to edit basic information for the article
- Click "Trash" to delete the post
- ,…
4/
- View the status of the post
- The time the article was published
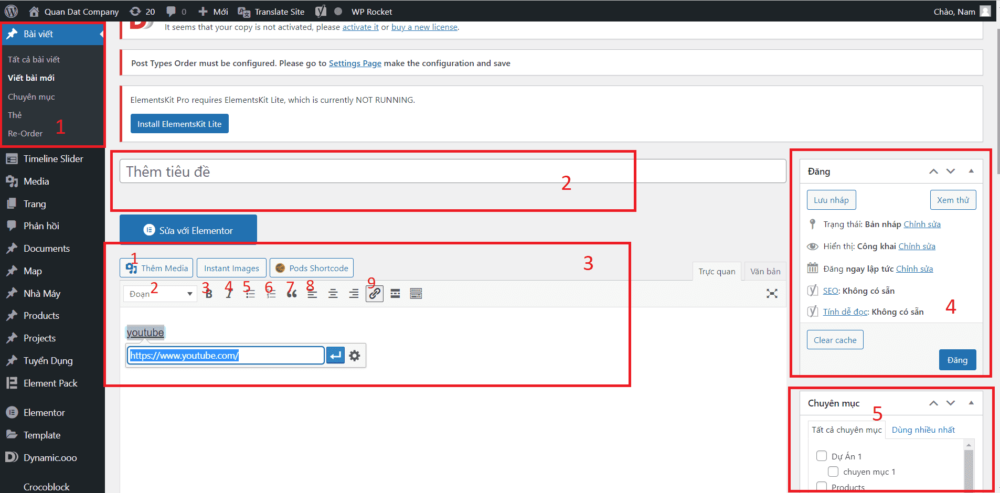
2/ New article page and edit article:

1/ Select "Write a new article" to enter the article writing page.
2/ Add a title for a new post.
3/ Edit text form:
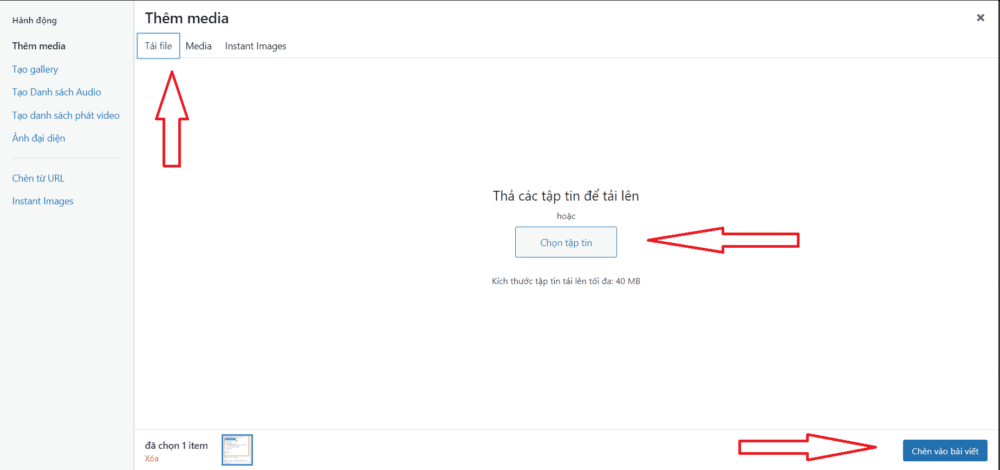
1. “Add Media”: Add an image or video file to the post


- Click “Choose file” then select the photo in the category you need to upload it
- Click "Insert into post" to add an image to the post
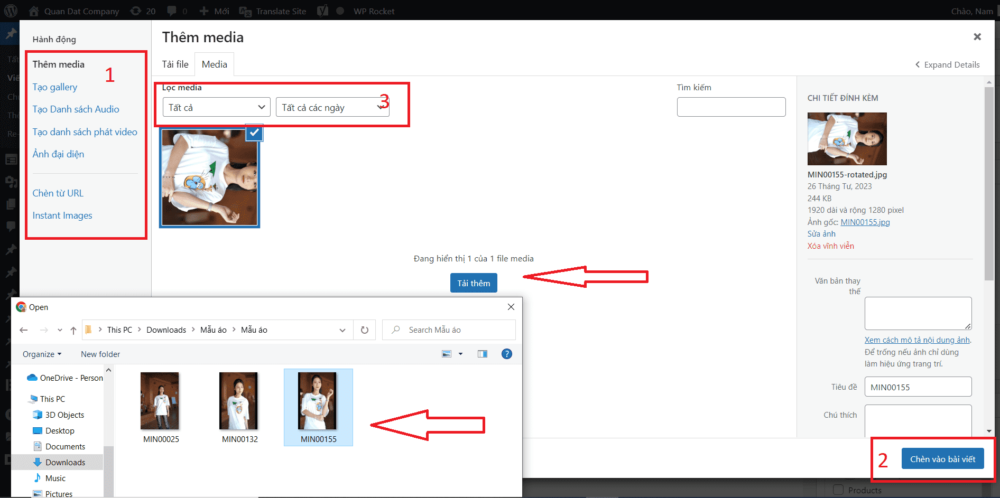
- Select "All" and select "All days" then adjust as you like to filter the image you want to find.
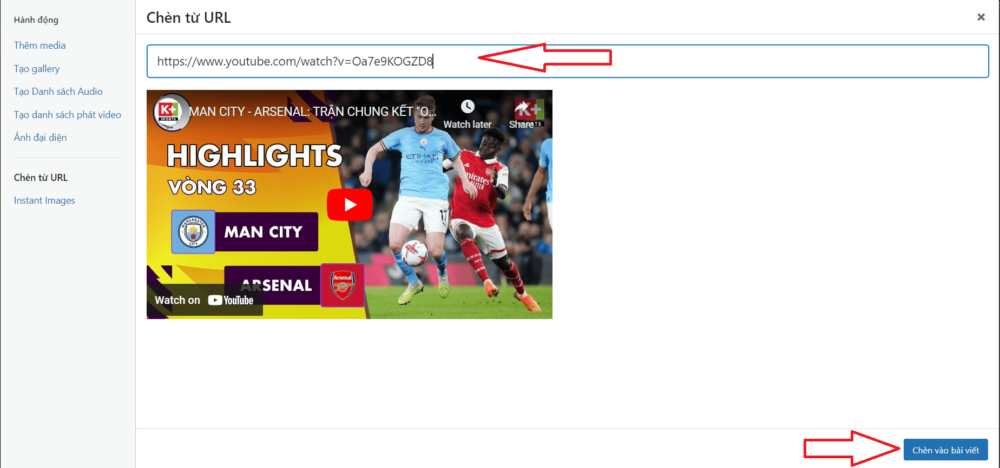
- Click "Insert from URL" to select the photo or video you want to insert into the post.

- To display more photos uploaded to WordPress, select “Media”, scroll down and select “Upload more”.

2. Click and select the title tag under “Paragraph”
3. Press ” B" to bold letters
4. Press ” I” to write italic
5. Add Bullets
6. Numbering at the beginning of the line
7. Add quotation marks
8. Adjust text margins
9. Insert the link into the text. Example: "Youtube"
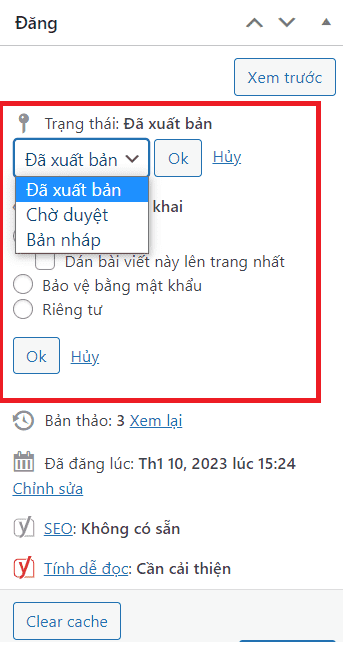
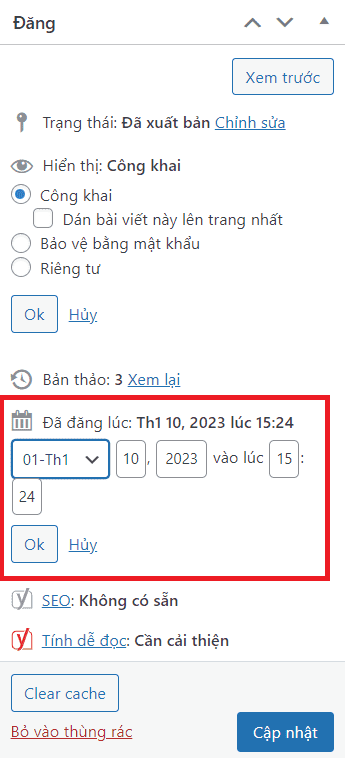
4/ Save and edit the post date or post
- Adjust the status according to the purpose

– Published: Allow anyone to access and view the article
– Waiting for approval: Wait for permission and check from an authorized person before publishing the article
– Draft: To edit an article, temporarily save the article to complete, qualify before publishing.
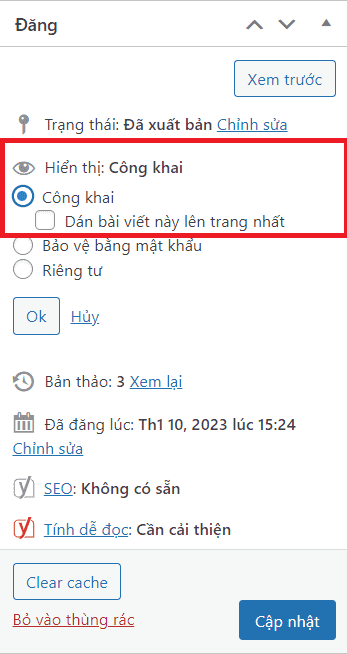
- Regime Public:

– Allow everyone to access and view the article
– Paste the article on the front page so that by default everyone will see this article when visiting the blog of the company website
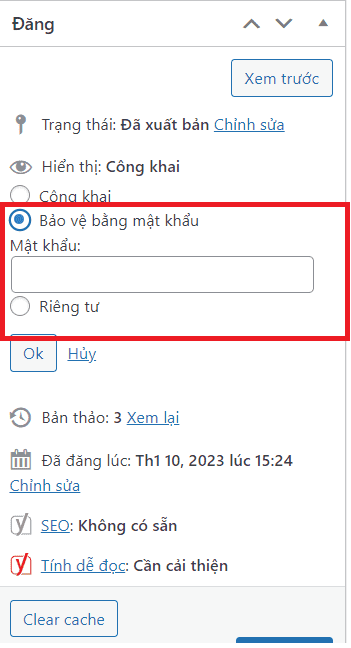
- Regime Password Protection:

– Choose a fixed password and only people with the password can see the post.
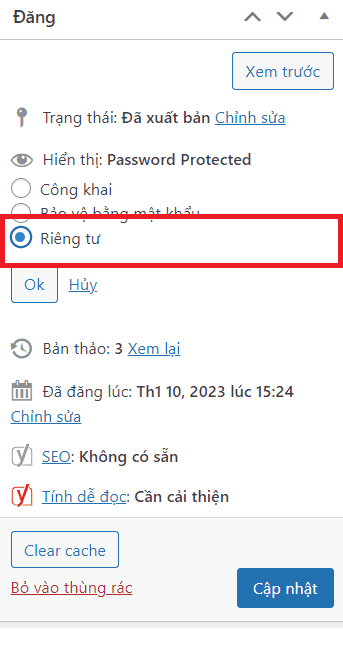
- Regime Private:

– Only authorized people, personnel in the company can see the article.
- Edit post time or update post:

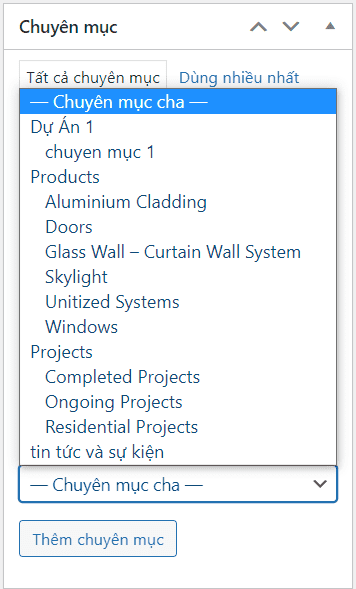
5/ Select a category to save the text
- You can add categories to your posts by clicking "Add Category"

- Select the category you want to add and which parent the article will be in.

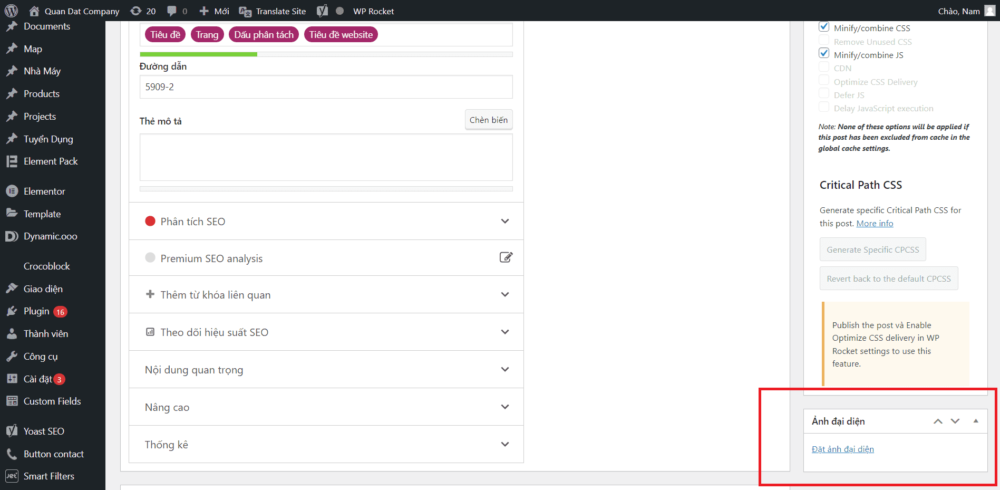
6/ Set a profile picture for the post
- Scroll down to the bottom and select the item to change the avatar, then select the image and set it up as in the "Add Media" step.

Above are a few basic guidelines for you to write articles on wordpress. Good luck.


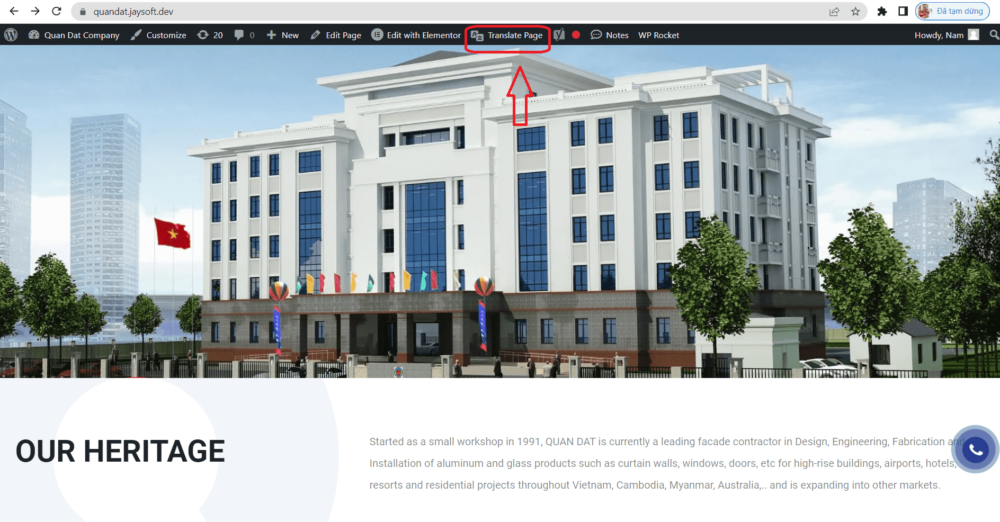 Select button Translate Page to manually translate the content to be translated